First, you need to know what a Wall Decal is! A Wall Decal or Wall Sticker is a pretty much a large sticker with low tack adhesive which allows you to apply it onto your internal walls in your home or office to display art.
Don’t buy cheap imported Wall Decals! They will damage your wall or fall straight off them! These instructions are for quality Wall Decals like that ones we produce and we use high quality removable products with water-based inks.
Peel & Stick Wall Decals

Wait! Before you begin… Peel & Stick Wall Decals may be the easiest Decal application you’ve ever experienced! In fact, by following only 3 steps, you’ll have a stunning looking wall. Before you begin, it’s important to remember that decals work best with matte, eggshell, satin or semi-gloss paint finish and are not recommended on highly textured concrete, highly textured wallpaper, stucco or primer finishes. Now, let‘s get started shall we?
STEP 1
Give your wall a quick wipe down with a damp cloth to create a clean, smooth and dust free surface. If you have a wash’n’wear painted surface, get yourself a piece of light grit sandpaper and give your wall a quick go over. This will give the Decal grip to grab onto it. Make sure you wipe away the dust well. For freshly painted walls, allow 2 weeks for the paint to cure before attaching your Decal.
STEP 2
If your Decals are large (bigger than 40cm wide) use masking tape to hold the decal on the wall, step back and see how it looks where it is. Adjust as desired and take a photo! You can use this to look back on for positioning. Peel your Decal off the backing paper and stick it onto your wall. Press one edge of the Decal onto the surface and smooth your Decal from the middle to the outside with your hand. Repeat if your Decal has multiple parts. If there are bubbles, use your fingers to move them out or alternatively use a credit card.
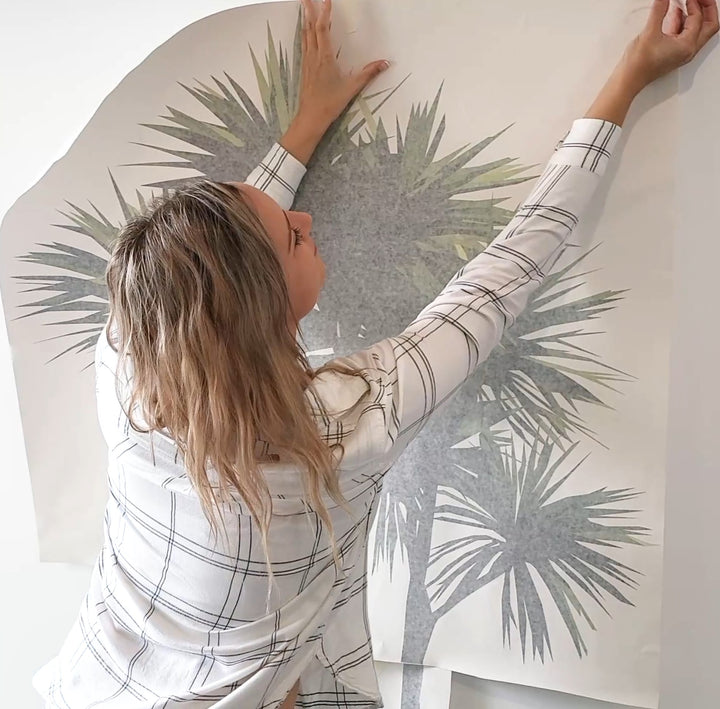
Regular Decals with Application tape

These Decals are more detailed. They are not just one solid sticker but have been carefully cut out around the edges of the design and also possibly inside it. Why? So, when your Decal is on your wall, there will be no background colour which will allow your design to really show itself off. Thus, leaving only the surface colours of your wall as the background. This can look as if the Decal has been carefully drawn with high accuracy straight onto your wall! As these Decals have fine details, you can’t simply stick them straight onto your wall as your will get tangled in all the small parts. So, we add application tape on top of the Decal. This will allow you to apply the Decal smoothly in one go, then remove the application tape. Application tape is also used on text so you can apply entire paragraphs in a go without having to line up EVERY. SINGLE. LETTER! YAY!
STEP 1
Pre-clean your surface with a damp cloth and ensure the surface is dry before proceeding. Note: Allow 2 weeks for paint to cure before applying your Decal.
STEP 2
Decals are for one-time use, so take your time to choose the perfect spot. Tape the design to the surface with masking tape to make sure it’s exactly where you want it. Use a level if necessary.
STEP 3
Fold back the top of the design, begin peeling the white backing paper from the graphic and transfer tape at a 45° angle. If some of the Decal doesn’t come free, press it down again, and give it a quick rub over on the transfer tape side. Peel down the white backing paper about 20cm from the top.
STEP 4
Once the white backing is removed the adhesive is exposed, so be careful the design does not fold over onto itself. Press and fold the top of the white backing over (about 20cm from the top), and then rub the exposed section of the design onto the wall.
STEP 5
Continue to rub the remainder of the design onto the wall while peeling off the white backing. If you decal is large, ask a friend for help. Otherwise you should be able to manage the application in one step.
STEP 6
Now, start at a corner again, and slowly peel of roll the transfer tape away from the Decal at a 45° angle. Continue until the transfer tape is completely removed from the wall and graphic.